Posts Tagged ‘PHP’

How to install Composer inside WordPress

Sunday, March 26th, 2017 | Programming

WordPress has an ancient and ugly codebase. When you are writing plugins, you often want to make your code less horrible and use Composer to bring in dependencies as normal. How do these things fit together?

The first thing I tried was to create plugin-specific dependencies list. Inside the plugin directory, I created a composer.json> file, then ran the install and uploaded it.

This approach works fines when you only use a dependency once and no other plugin uses the same dependency. However, when I wanted to re-use a library in another plugin I had a problem. If I included it twice it would crash.

Installing Composer globally

The solution I came to was to do a global install of Composer. I created a composer.json file in the root and listed all of the dependencies I needed for my plugins in there.

Then, in each plugin, I checked for the file and included it.

if (file_exists(sprintf('%s/vendor/autoload.php', ABSPATH))) {
    require_once sprintf('%s/vendor/autoload.php', ABSPATH);
    add_filter('the_content', 'simple_related_posts', 30);
} else {
    add_action('admin_notices', function() {
        echo '<div class="notice notice-warning is-dismissible"><p><em>Simple Related Posts</em> plugin requires <strong>Composer</strong>.</p></div>';
    });
}

Drawbacks to this approach

This means plugins are no longer self-contained. You have to install the plugin and add the dependencies to your central composer.json file. That is messy.

With the code above, it does not check if the _correct_ dependencies are there. This is something you could add in. However, given the problem above, it seems like it would require so much manual management anyway that I would know what was going on.

Optimise for performance

If you are using Composer on production, do not forget to optimise the autoloader before uploading your files.

composer dumpautoload -o

Conclusion

Personally, I would rather lose plugins being entirely self-contained and benefit from Composer libraries. This approach works well for me because they are purpose-written plugins for my blog.

However, this approach would not work well if you were publishing your plugins as most WordPress users would not know what was going on.

How to run Webpack Dev Server with PHP

Monday, March 20th, 2017 | Programming

You are making an awesome new JavaScript-based app in React. However, it needs to live inside an existing framework, such as Symfony for PHP. You want the hot-reloading function that you get with Webpack Dev Server, but you also need the content to be served from your LAMP stack because it creates the HTML wrapper page.

What do you do?

The answer is to run two servers: both Webpack Dev Server and your existing Stack. Here is how…

Configuring Webpack

Start by installing Webpack Dev Server as usual.

npm install --save-dev webpack-dev-server

Create a script entry in package.json to run it:

"scripts": {
    "start": "node ./node_modules/webpack-dev-server/bin/webpack-dev-server.js"
}

We also need to make one change to our webpack.config.js file. We need to tell the output to point back at the Webpack Dev Server. Otherwise, it will point at your LAMP stack.

output: {
    publicPath: 'http://localhost:8080/scripts/'
}

Super. Next, let’s configure the LAMP stack.

Configuring your existing server

This step is easy. All we need to do is to point the JavaScript at the Webpack Dev Server.

Let’s say you have this at the moment:

<script src="/scripts/app.js"></script>

Change it to:

<script src="http://localhost:8080/scripts/app.js"></script>

Remember that when you are building for production, you will want to take the changes out. The easiest way to do this is to have a dev webpack.config.js file, and a production one, and have your build tool use the correct one depending on the context.

How we built Rena Men

Monday, October 3rd, 2016 | Programming, Tech

rena-men-september

Recently I launched a new website, Rena Men. It is deployed onto the Heroku platform and does quite a bit of cool stuff, so I thought I would document what I have done here.

Code

It is implemented in PHP, using the Rauma framework. Rauma is a project I developed for Learn Finnish and subsequently open-sourced.

Rena Men is built in several modules. There is a website, a content management system (CMS) and an image server. Because they use common functionality like the entity classes, there is also a shared library which is brought in as a Composer dependency.

The website itself is fairly straight forward. Beyond the PHP, there is only the CSS, pre-processed with SASS, and a tiny amount of JavaScript loaded in with require. The CMS is a bit more complicated, using Babel to transpile the ES6 JavaScript, and styled up with Bootstrap.

Deployment

Each module is deployed onto the Heroku platform. This makes it really easy to do as I can roll out an update just using git push. The code itself is stored in a series of private repos on BitBucket, and the Heroku build process fetches them from there.

In the case of the CMS, it also uses the Node build pack to run a Bower install. Third-party additions such as Bootstrap are pulled in on-the-fly just like we do with Composer dependencies. Heroku does not have SSH key integration for Bitbucket (it does for Github) so I’m using a ready-only account with Basic HTTP auth access.

The database is provided by one of the Heroku app add-ons. The storage is provided by Amazon S3. Heroku is built in AWS, so that fits nicely. We store originals in the file system and then crop them on-demand using the image server.

Delivery

Because cropping images is expensive, the image server originally had a local file cache where it would store each crop. However, as Heroku has an ephemeral file system, you cannot write to it, so I had to turn that off in production.

Instead, we’re using the AWS CloudFront CDN. This was super easy to implement. I just created the settings in AWS, pointed CDN subdomain at AWS and it started working. Like other web proxies, it caches your content based on the headers you send it.

Combining arrays in PHP

Monday, June 6th, 2016 | Programming

html-code

If you need to combine two arrays in PHP, you first thought might be to use the + operator. However, this is unlikely to do what you want it to to. If we look at the following example, you might expect it to output an array with all three elements.

<?php

$listA = ['banana'];
$listB = ['apple', 'pear'];
$listC = $listA + $listB;

var_dump($listC);

However, what you will actually get back is an array containing two elements: banana and pear. This is because when you use the + operator in PHP it combines it using array keys. Even though these are non-indexed arrays, PHP looks at them like this:

[0 => 'banana']
[0 => 'apple', 1 => 'pear']

Therefore when you add them together, it combines the keys, taking the earliest. In this case, to get the result you want, you want to use the array_merge function. For other scenarios, PHP has a range of different functions to combine arrays in different ways.

Word Search, a PHP library

Sunday, June 5th, 2016 | News, Programming

Have you ever been working on a PHP project and found yourself thinking “what I really need is a way to quickly and easily drop a word search in to this code”? The answer is almost certainly, no.

However, while working on Learn Finnish I found myself in exactly this situation. Being unable to find a good library, I wrote one and published it on GitHub. It is freely available under the MIT license and registered with Composer:

composer require xmeltrut/WordSearch "^1.0"

All you have to do is pass in some words and it will generate a puzzle. It supports horizontal and vertical words, intersecting words and comes with two alphabets by default: English and Finnish.

If you’re feeling generous, head over to GitHub and star it.

word-search

Travis CI

Monday, May 30th, 2016 | Programming, Tech

travis-ci

Travis CI is a cloud-based continuous integration tool. Notably, it is also free for open source projects. They do paid subscriptions as well if there is a private repo you want to test. If you just want to test a public GitHub project though, it’s free and really easy to set up.

You can log in with your GitHub account. Once you have done this, you are given a list of your projects and you can turn on Travis CI for each one individually. Using the GitHub hook, you can configure Travis CI to automatically run a build every time code is pushed to the repo.

It supports an array of different languages and platforms. To get up-and-running, you need to add a config file into your repo. This is pretty simple. Here one I am using for a PHP project:

language: php

php:
– ‘5.5’
– ‘5.6’
– ‘7.0’

install: composer install

This configures it to run it on three different versions of PHP, and install the dependencies before starting the test. It comes with many of the common PHP extensions already enabled, and an additional list of ones you can enable if you need them.

Badge Poser

Sunday, May 29th, 2016 | Programming

badge-poser

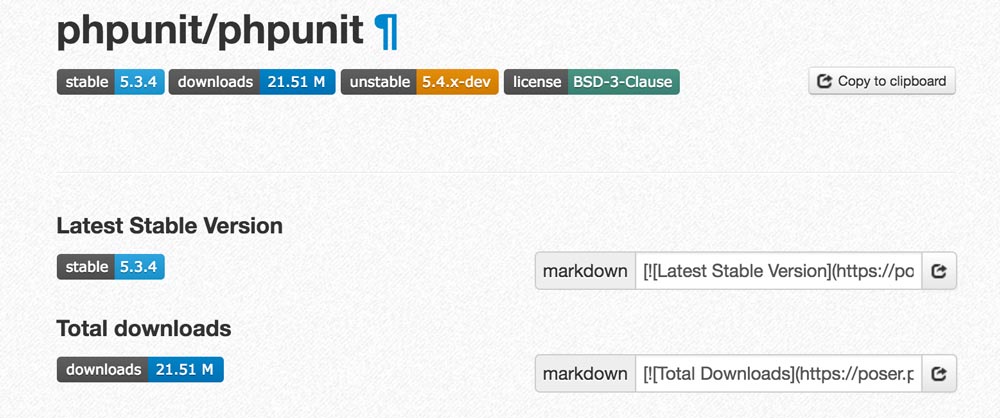
Badge Poser is an online tool that generates badges your PHP projects’ readmes. There is zero setup: it integrates with Packagist, so once you have your package setup you simply go to the website, enter your package name, and it generates the badges for you.

It then generates a series of Markdown for you to insert into your readme. This will then display anywhere where your readme is rendered: GitHub and Packagist for example.

Currently, it can generate badges for:

  • Stable and dev branch names
  • Total downloads
  • Monthly and daily downloads
  • License

Modernizing Legacy Applications In PHP

Tuesday, December 8th, 2015 | Books, Programming

Modernizing Legacy Applications In PHP is a book by Paul M. Jones on how to bring legacy codebases up to date. Jones is a relatively big-whig in the PHP community, being involved in most of the PSR standards and a contributor to the Zend Framework.

For me, the book was both excellent and uninformative. What I mean by that is that I do not think I learnt anything from reading it. However, I flatter myself that I am pretty good at PHP and have spent many years working with legacy codebases. It was always been an interest of mine, and I have previously submitted conference papers on the subject. I have been doing just what this book describes with my current client.

That in itself shows the quality of the book though. It describes every step I have been going through in a logical and clear order. It explains introducing autoloading, separating out the concerns, adding unit testing and injecting your dependencies. It says you from the tangled mess to a clean and modern application in an easy-to-follow manner. In short, it is pretty much everything I would recommend to someone starting to clean up a legacy application.

It has code examples and some tips and tricks in it, but for the most part it is quite high level. It also deals with PHP 5.0 and onwards. There is perhaps room to expand here. At Buzz I had to come up with techniques to support ancient problems like register globals, and at the NHS I ran into PHP 4.6 installed on their servers. Solving these kind of problems, and the little code tricks you can do, might have been a useful additional also.

Overall, I would recommend this book to anyone who feels the least bit daunted by the idea of modernising a legacy PHP codebase. It is clear, easy-to-follow and takes you through exactly the steps you should follow.

modernizing-legacy-applications-in-php

cURL SSLv3 calls failing

Wednesday, July 22nd, 2015 | Programming, Tech

If you try and connect over HTTPS/SSL with cURL you may get an error similar to:

sslv3 alert handshake failure

Or:

Unknown SSL protocol error in connection

If you cannot see a descriptive error message, use –verbose to report everything.

The cause of this often that hosts have disabled SSLv3 because it has now been compromised. The solution is to use TLS, which is a newer more secure protocol.

curl --tlsv1 --verbose hostname

If you are using cURL in PHP you can change the SSL version to use TLSv1.2.

CURLOPT_SSLVERSION => 6

You should then be able to make the cURL request over SSL successfully.

Troubleshooting xdebug profiler

Thursday, May 28th, 2015 | Tech

Xdebug can be used to profile your PHP applications. However, it can be difficult to configure and get working. There are a number of gotchas to look out for.

Enabling

To enable the profiler on every request you can use the setting:

xdebug.profiler_enable = 1

If you want to just enable it for certain requests you can use:

xdebug.profiler_enable_trigger_value

This will allow you to use ?XDEBUG_PROFILE=1 in your query string. However, if you are using mod_rewrite to rewrite your URLs in Apache, you need to make sure the rule has the [QSA] flag in it to pass the query string through or this will not work.

Output direcotry

You can set the output directory to whatever directory you wish using the output dir setting:

xdebug.profiler_output_dir = '/tmp/xdebug'

However, xdebug will not create this directory for you. You need to manually create the directory and give write permissions to the web server too.